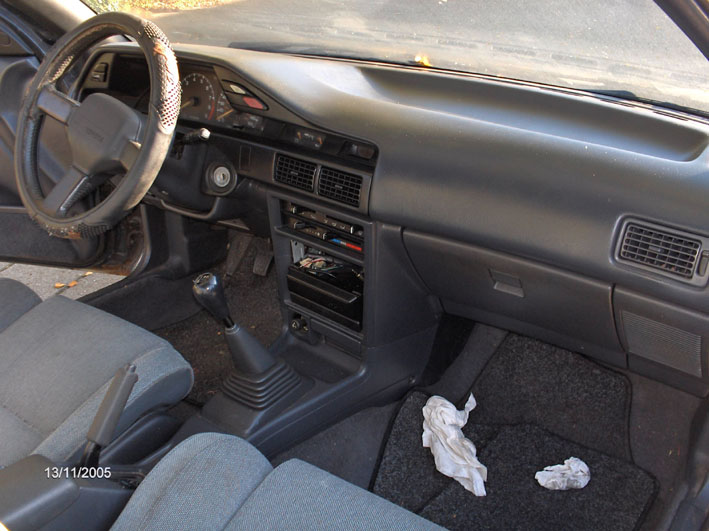
Modifying the dashboard
I want to use some extra gauges in the car that are not in there yet.
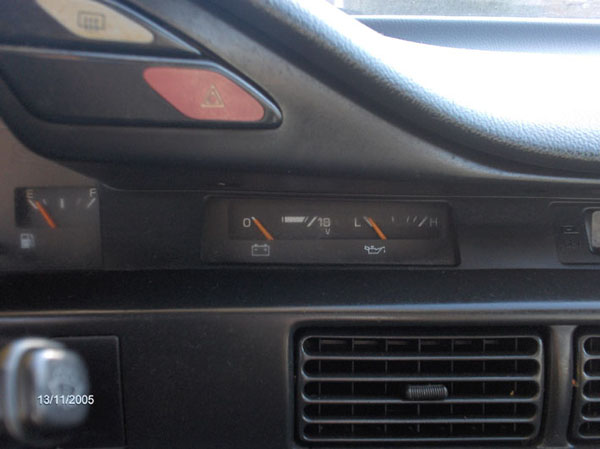
The GT-S model already came equipped with an extra voltmeter and oil pressure gauge that lesser models have to do without. But these gauges are pretty indicative and can't really be considered as precision instruments.
Besides, they really look like a afterthought sitting in the dashboard where they do.
The dashboard of the Toyota Corolla GT-S coupé with the sporty extra gauges.
I must admit, a oil pressure gauge is a very useful one. You don't want to push a engine to much when oil pressure is to low.
A voltmeter isn't something I find really useful. It's nice to know the battery is still alive and is being charged, but it's not a value that changes a lot and when the alternator is broken and doesn't charge the battery anymore, you get a warning light in in the instrument panel. So I could easily do without that one.
So, what gauges would I like to add to the instruments aboard my car? There are a lot of things happening in the car that I would like to keep an eye on. But there are four I would really like to have in my instrument panel:
-
A oil pressure gauge
-
A oil temperature gauge
-
A intake pressure gauge (sometimes better know as a turbo pressure gauge)
-
A clock (The current clock will be deleted)
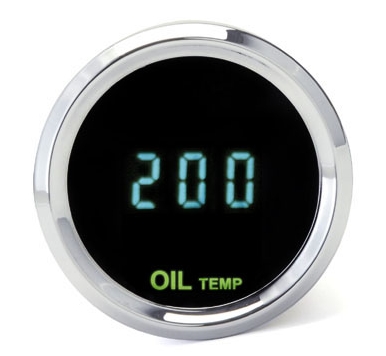
And I don't want just any gauges in my dashboard. As I want to use the digital instrument cluster, I want gauges that match that as close as possible. That means they will have to be digital as well.
When I searched the internet for digital gauges, I found a whole lot of them. But there wasn't one that really ticked all the boxes for me. I wanted gauges that also stated what value could be read from them, and the color of the display had to match the rest of the instruments.
After searching some more, I finally found something that might just work. They had the right color display (teal, that greenish color old digital displays had). They could be ordered with black and chrome bezels (I went for a factory look black of course) and they could be switched from American to metric read out. And aside from that, they also had some nifty features like dimming when the lighting was switched on and upper an lower alarms that could be set by the user. And totally switched off, they would have a black front face, just like the digital instrument cluster in the car. They were made by Dakota Digital and looked like the were really great quality. They did cost a bit more too, bit if they were as good as I thought they would be, they were definitely worth it.
So I ordered the gauges I wanted and had them shipped over from the US of A.
Now that I had to gauges, I had to figure out a where I wanted them in the car. I really don't like those A-pillar gauge holders and those gauge holders that sit on top of the dashboard are not quite my style either. I'd like it to look as if Toyota could have put them there themselves somewhere in the dashboard. But as it sits, there in nowhere to install them. So that left me with only one option: Modify the dashboard so that I could incorporate the new gauges somewhere.
I didn't really like the look of the stock coupé dashboard anyway. It doesn't look like Toyota really thought it through and I think it even looks a little cheap. So lots of room for improvement if you ask me!
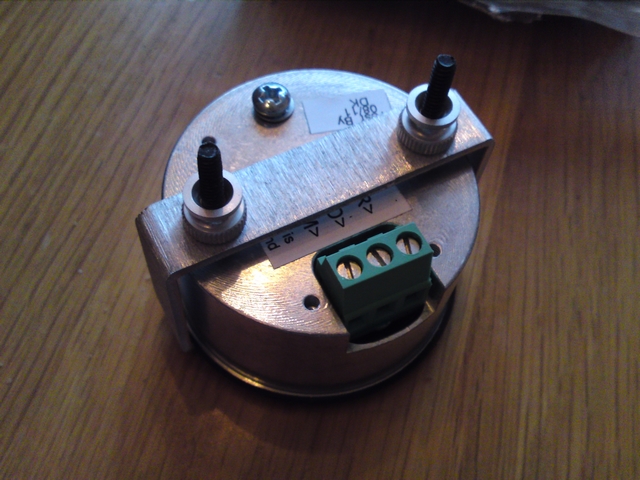
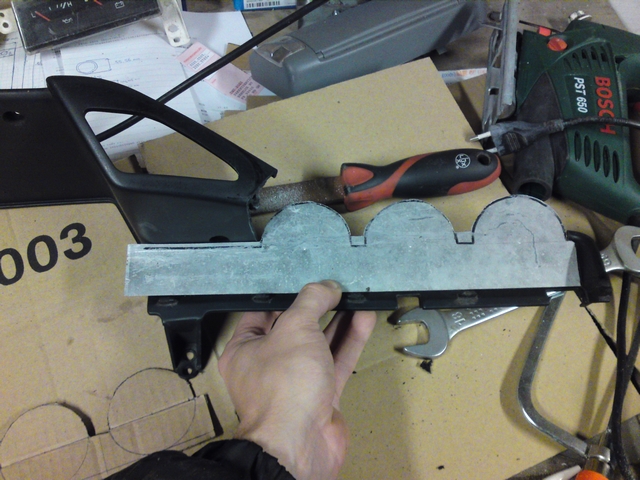
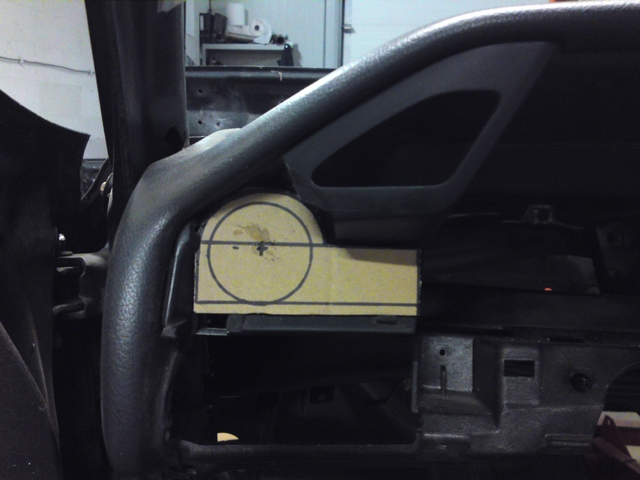
Because I didn't have the gauges just yet (there was a delivery time and then they still had to be shipped) I made a dummy with the correct dimensions out of a piece of scrap steel on the lathe at work.
I could then use that dummy for all the measuring an mocking up.
After looking at the dash and the size of the gauges, and thinking it all over for a while, I came up with an idea on how it might just work.
But I would have to cut up the dashboard and make some big modifications to the dashboard. Once I cut the first pieces out, there was no way back for me. Finding another coupé dashboard would be extremely difficult or mighty expensive to ship one over from the states or Japan.
But I like a nice challenge, so let's get on with it!
With the plan on how to create the new dashboard in my head, I made a few cardboard templates to see how it would work out.
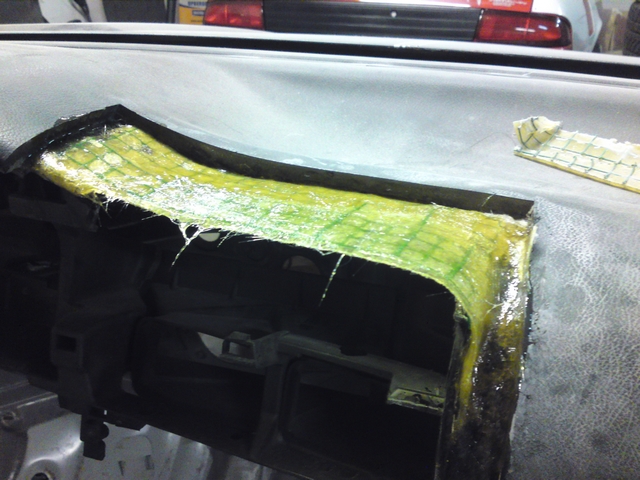
I was going to reshape and rebuild the dashboard using polyester resin and fiberglass mats. If you build up enough layers, it can be pretty strong. But it's also pretty brittle. I was afraid it probably wasn't going to take the stress of the brackets that hold the gauges in place without cracking or something like that. So I wanted to use a aluminum plate, incorporated into the resin to give it some more strength.
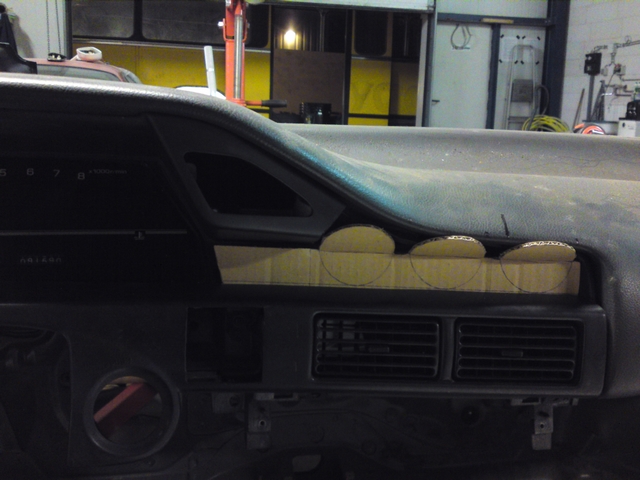
This would give me room for 3 gauges.
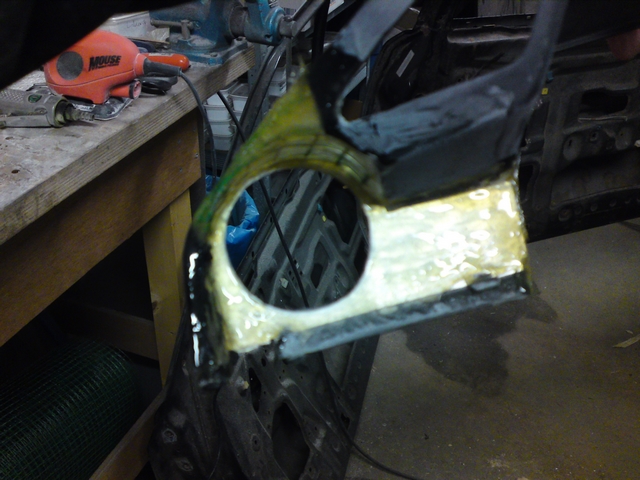
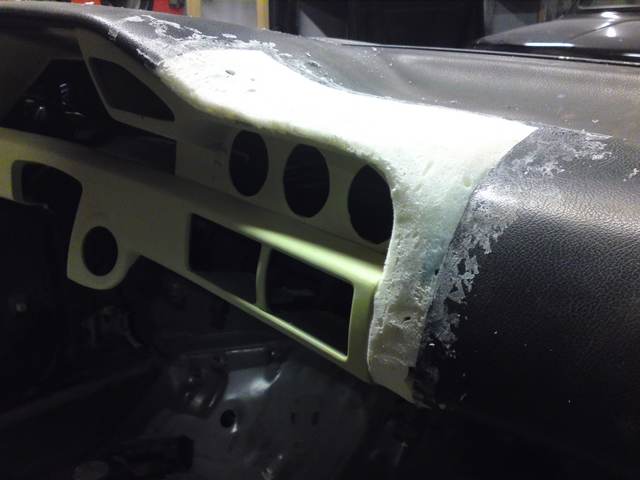
To make room for the extra gauges, I was going to be a bit drastic and put the saw to the dashboard and rebuild it later on to give it the shape I wanted.
A few parts of the dashboard and it's internal structure would have to be deleted as well, for the simple reason that they were in they way of the new gauges.
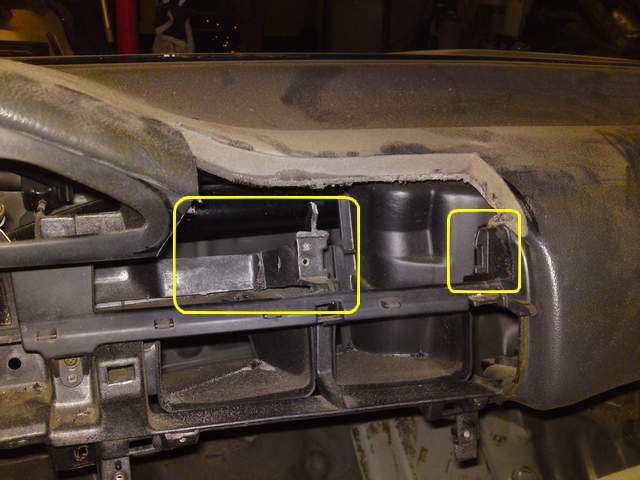
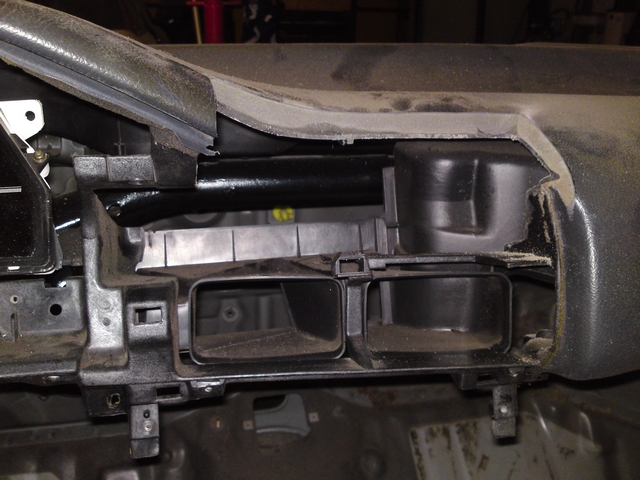
There, that cleaned up well. Now I have enough space to accommodate the new gauges.
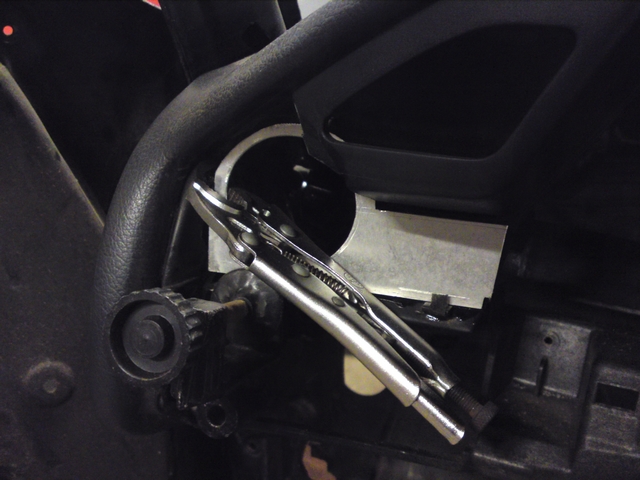
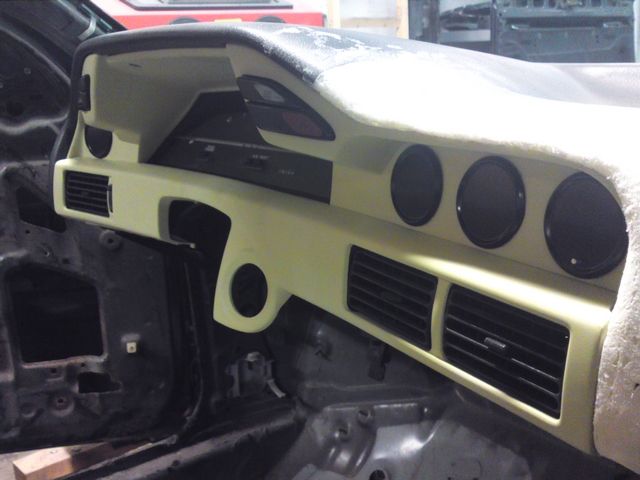
I had to check regularly if the gauges would all fit the space I intended them to take up in the dashboard. And if there were still things in the way, I would have to cut that out and see if I had to rebuild it later on or if I could simply do without.
And it's always nice to see how things are coming along and how it's going to look afterwards. You can have a image in your head of how you want it to look, but sometimes you just pictured it wrong and it could be a little different in reality.
In the pictures above, you can see that the gauges are slightly facing the driver position.
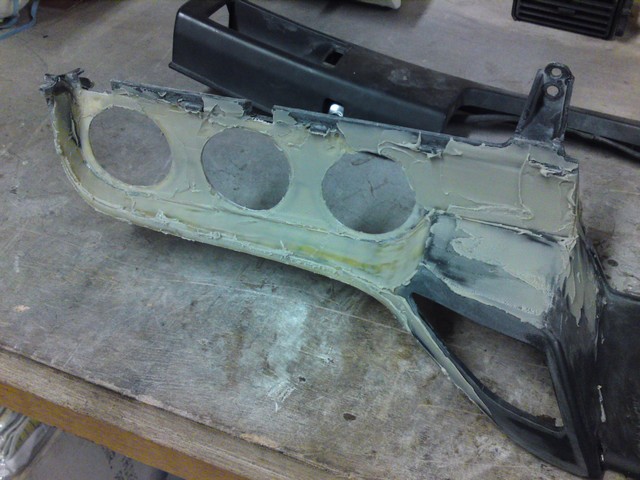
Cutting holes in a dashboard is easy. But those holes will have to be closed up again as well.
So now everything would fit and I had enough room to accommodate the new gauges, it was time to start rebuild the dashboard again.
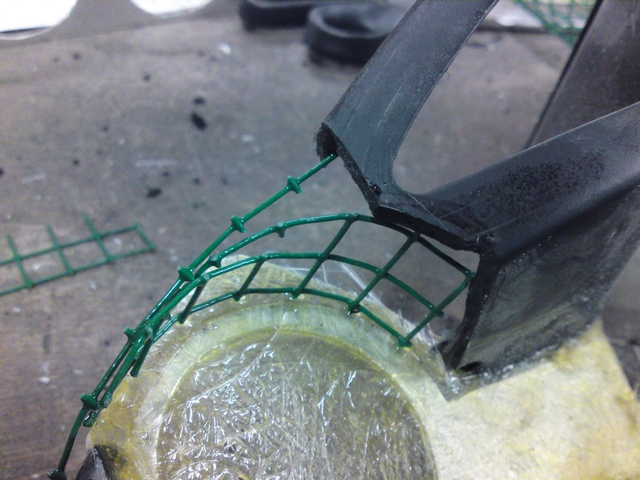
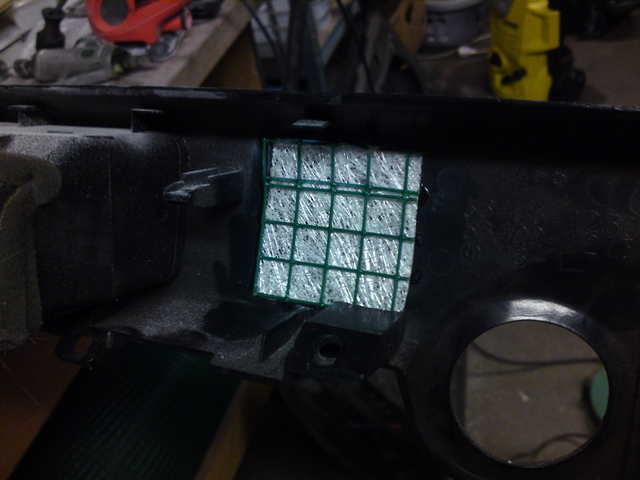
Now, the thing is that polyester resin and fiberglass mats don't have some sort of structural integrity of their own and they require something to keep them in the desired shape until it cures and hardens. So i needed something to lay the fiberglass mats on and apply the resin to.
But it would need to be easy to shape, not to heavy, but still sturdy enough to stay in shape.
I opted for fine metal wire netting. That would also act as a reinforcement for the resin (think of rebar in concrete).
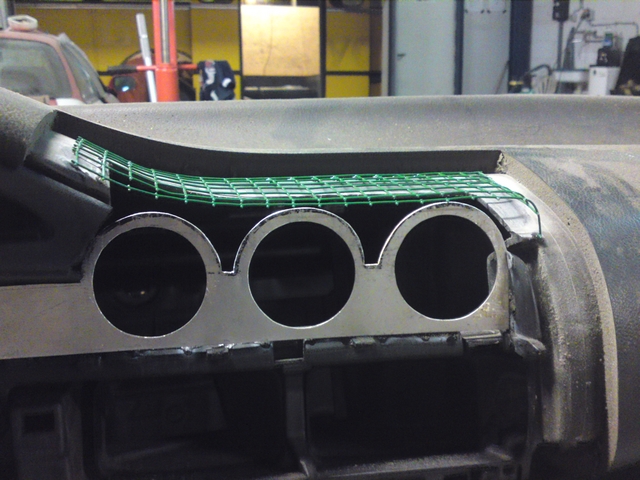
I fastened the pieces of formed netting in place with superglue that would keep in fixated until the resin was applied and hardened.
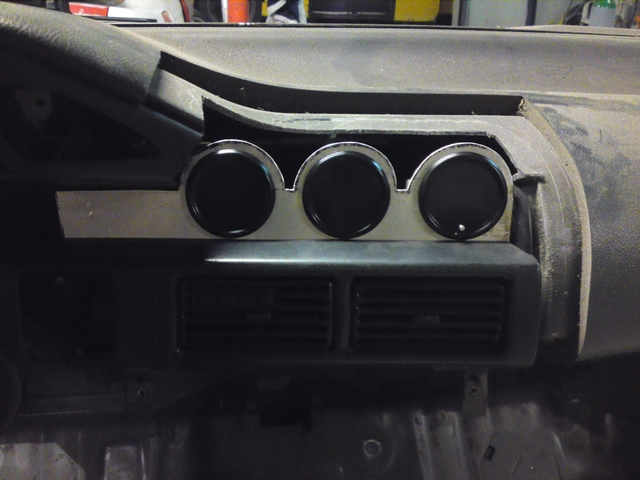
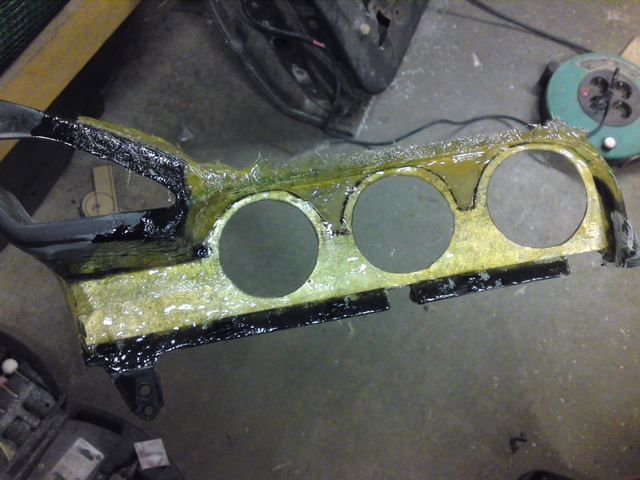
But the observant readers might start to wonder: weren't you going to use 4 gauges? Now you only have room for three?
Yes, you are absolutely right and I would have to find a spot to install the last gauge. I didn't have any more room on this side of the dashboard. As I was making it now, it would flow nicely and join with the center console in anice and logical way. Adding another gauge there would only look funny in my eyes.
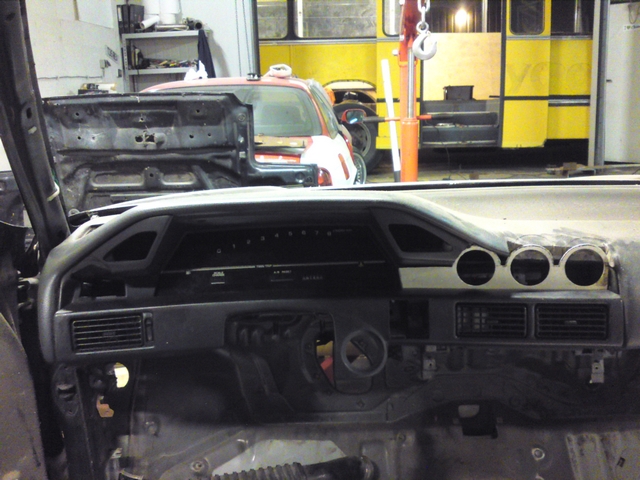
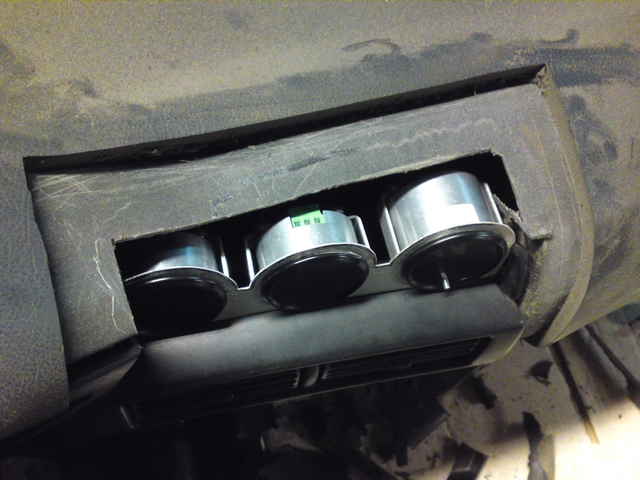
There was a little bit of space on the other side of the instrument cluster, but it was going to be tight to cram another gauge in there, but it might just work and still look half decent.
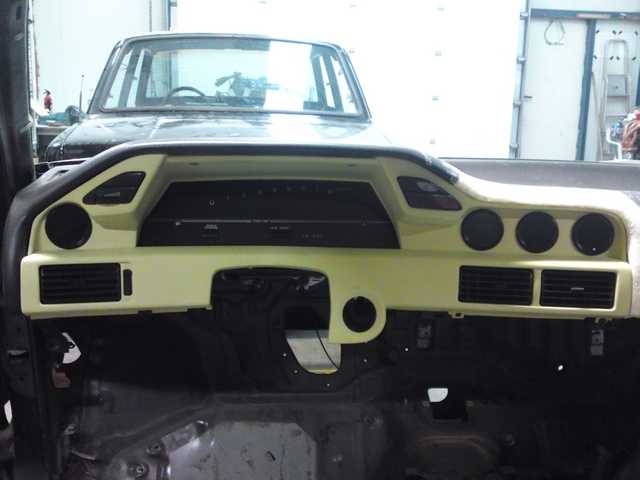
Well, that worked out rather nice. Enough room the place the last gauge.
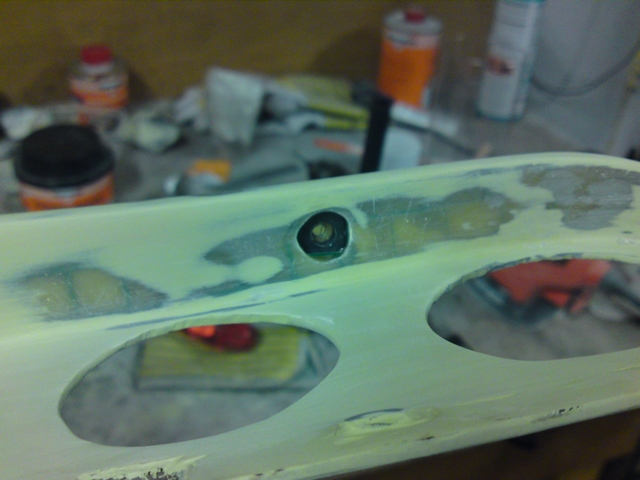
Now I could continue to rebuild the dashboard again. Using the metal wire netting, I laid down the basic shapes and applied the first layer of polyester and fiberglass mats. When they were on and had hardened, it was just a matter of laying on more layers and build up the strength and body of the new dashboard.

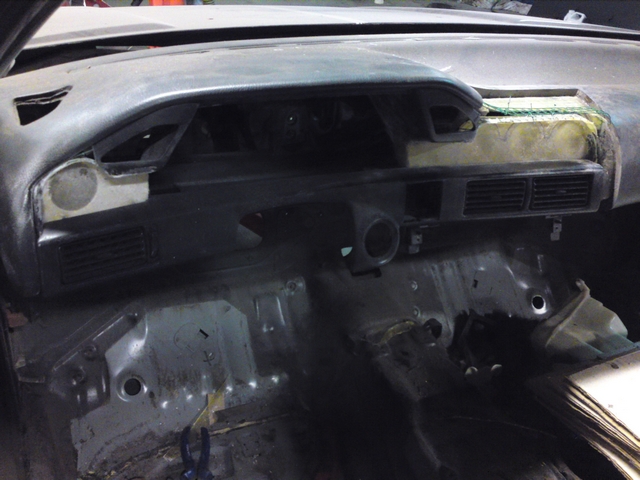
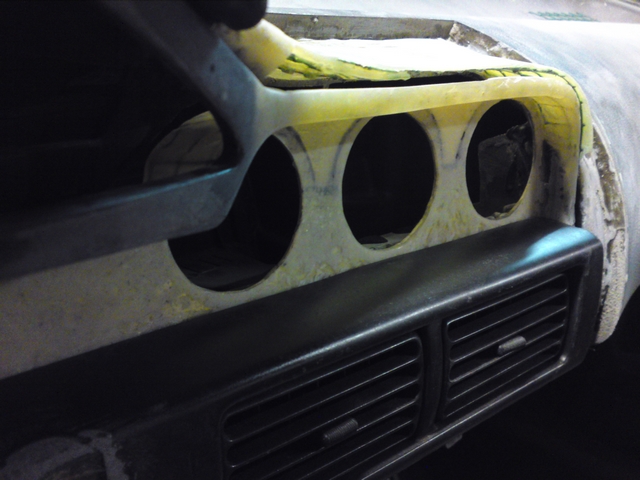
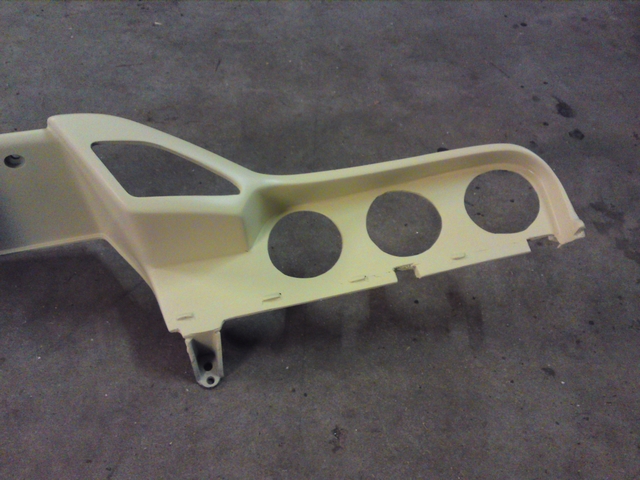
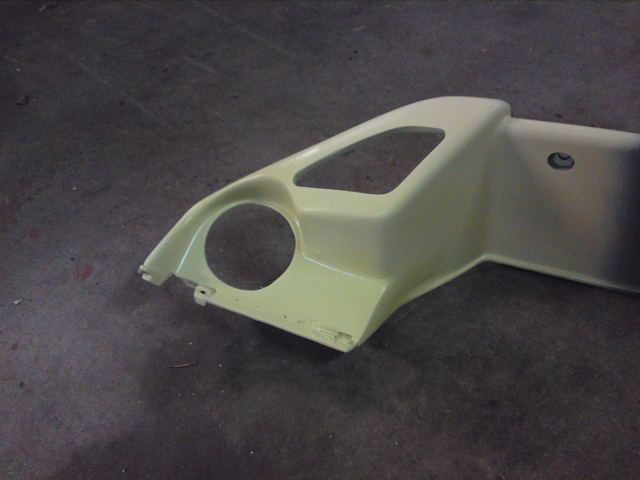
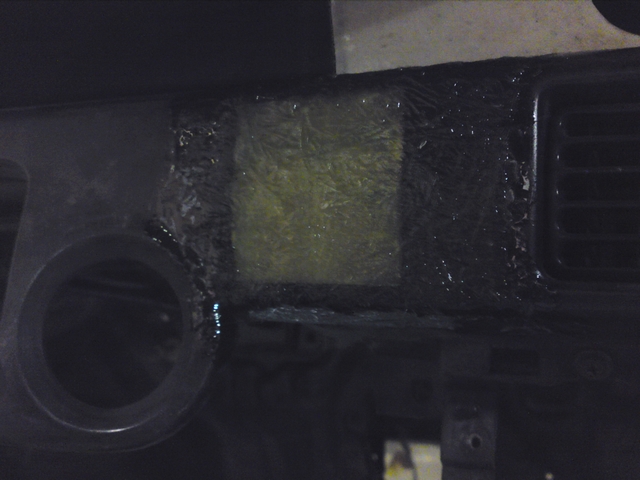
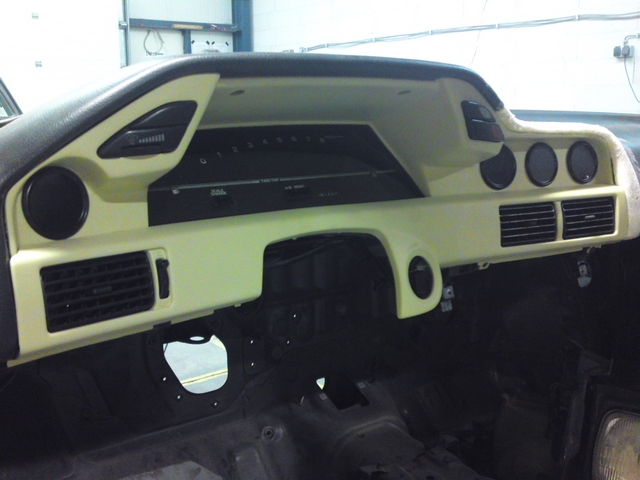
After a few days, the final layers of poly resin and fiberglass had been applied and thing could be trimmed down and sanded a little into the shape that I wanted. Little by little, I could see the new dashboard starting to take shape. But for a nice finish, I would have to even it all out with a little filler that would have to be sanded down into the final smooth shape.
To fill the last imperfections I applied a layer of spray on filler. Not only did that really smoothen out the surface of the dashboard bezel, it also gave it a uniform color and made it look like a single piece. This was the first time I actually started to see the final product.
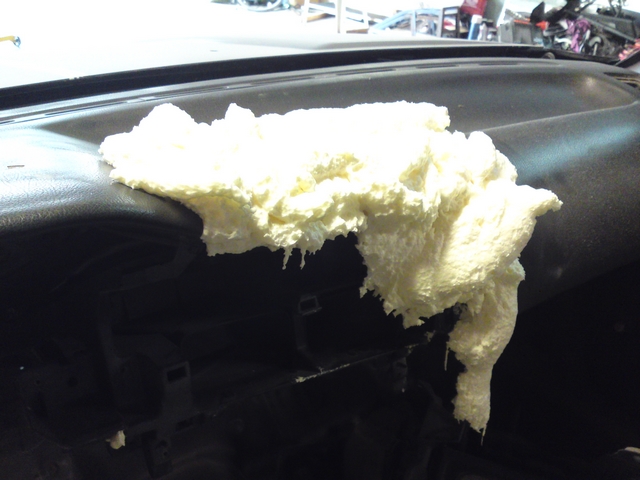
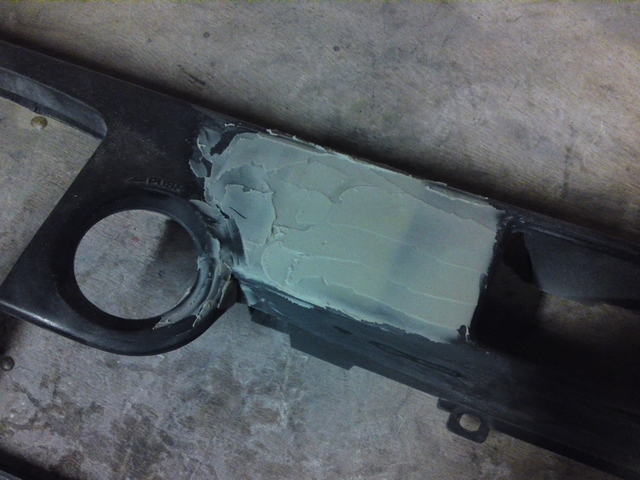
The dashboard itself needed some finishing touches. The polyester layers only form the structure of the dashboard. That structure is then covered with a foam like material and some sort of vinyl as a outer layer. I had to cut some of that foam and vinyl away to let my new structure adhere to the old structure. But I needed to fill in the gaps and shape the outer layer of the new dashboard for it so be re-upholstered.
I figured PUR foam might just do the trick. It could easily be applied, it formed a foam sort like layer like there was on the rest of the dashboard and it was easy to shape with a sharp knife and some fine sandpaper.
Alright, I do admit that this was probably a bit much. But the excess material will be cut away.
That looks a whole lot better and everything joins up nicely with the existing dashboard.
Now I could try to install everything to see what it looks like when it all comes together. But when I trimmed down and cut away some parts of the dashboard, some bezels for screwing in parts of the dashboard were deleted.
Like those for the buttons on either side of the instrument cluster.
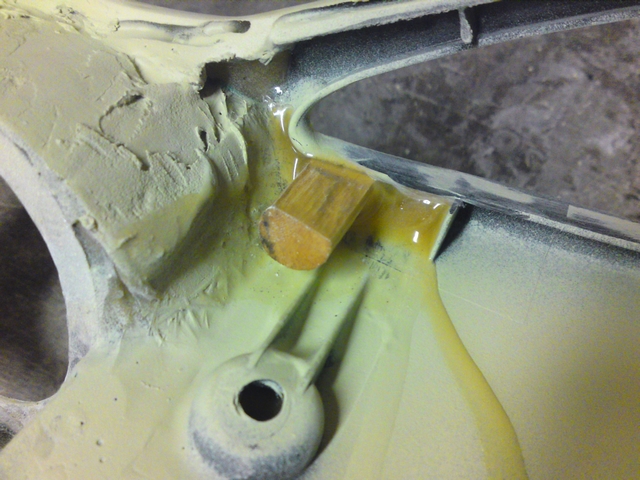
To be able to install those, I had to create new bezels. Polyester wasn't the ideal material for this. As I mentioned before, it's strong, but very brittle. When you try to screw into it, it will most likely crack or break. So I needed something I could screw into to hold the buttons in place.
I took a piece of small round wood with a diameter of about 10mm and glued that in place. The screws can be screwed into the wood and the buttons will be firmly held into place. I applied some more poly resin to the pieces of wood to make sure they wouldn't come loose.
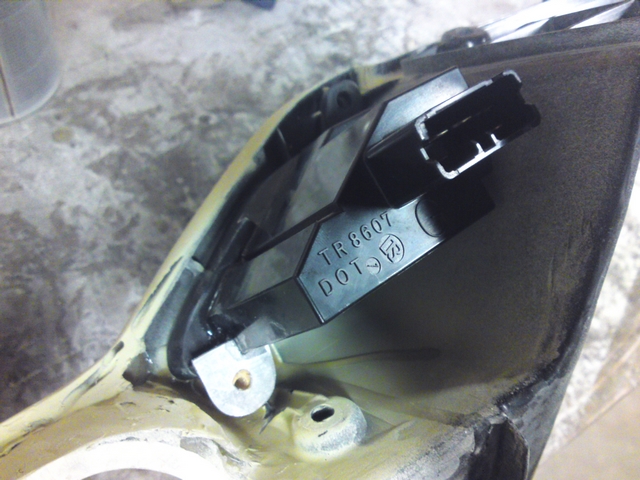
I also had to cut a piece of the buttons to make room for the new dashboard. Using some aluminum sheeting, I created new bezels on the buttons themselves that would keep everything in place. The aluminum pieces were glued on the buttons using superglue again.
I do admit, it does look a little nasty from the back, but it does the trick. Everything is securely held in place and you can't see anything of it from the front.

I had already cut out a piece from the cover that runs underneath the instrument cluster to place a fog light switch there. But that plan was canceled and now I was left with a gaping big hole in that cover. That had to be closed up and filled in again in a way that people would never notice that hole had been there.
I used the same method for rebuilding the dashboard and glued in a piece of metal wire netting as a base and laid a few layers of fiberglass and polyester resin in to fill it.
After a layer of filler and sanding it all down again, it was as smooth as a babies bottom and I couldn't even see where the hole had been anymore.
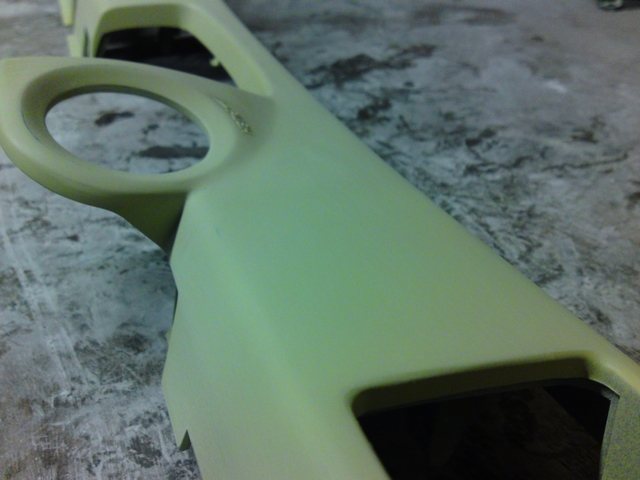
And when everything was said and done, everything was screwed back together to finally see the end result.
Apart from a bit of paint and upholstery, the rebuild dashboard was finished and I just couldn't wait to see if it looked anything like I had imagined when I started this whole operation.
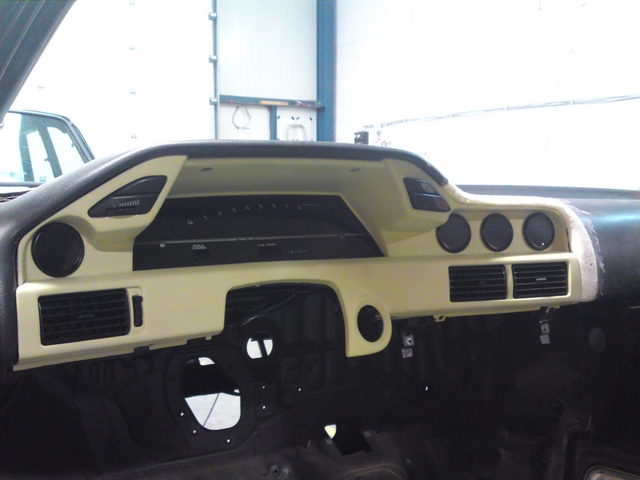
I for one am very pleased with how the dashboard looks now. It turned out to be exactly what I had imagined and for someone who has never done something like this before, I think it turned out great!
It still is firmly held in place and when the paint etc. is on I guess it looks pretty stock to those who don't know what a GT-S coupé dashboard is supposed to look like.
For those of you who are wondering what gauge is going to sit where: On the outer left position I'm probably going to install the intake pressure gauge, on the other side, next to the instrument cluster I want to read oil pressure, next to that is going to be oil temperature and on the outer right is going to be the clock.