Dismantling the 4A-GE
The 4A-GE engine that resided in the Corolla GT-S could use a little rebuild.
I only fired up the engine a few times, but I already heard noises of engine bearings that were giving up. And the engine itself was running a little rough.
I didn't look for what was causing that anymore, since the engine was going to be pulled from the car for a complete overhaul. It could well be solved when everything was cleaned up and the car was put back together with all new parts.
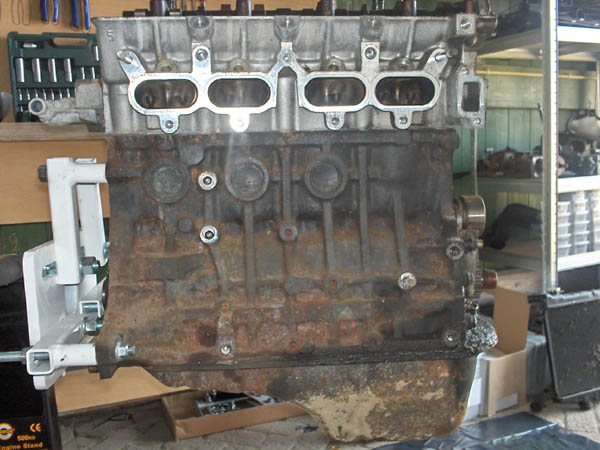
And it was not only the inside of the engine that could to with a good cleaning. The outside of the engine wasn't really in show condition.
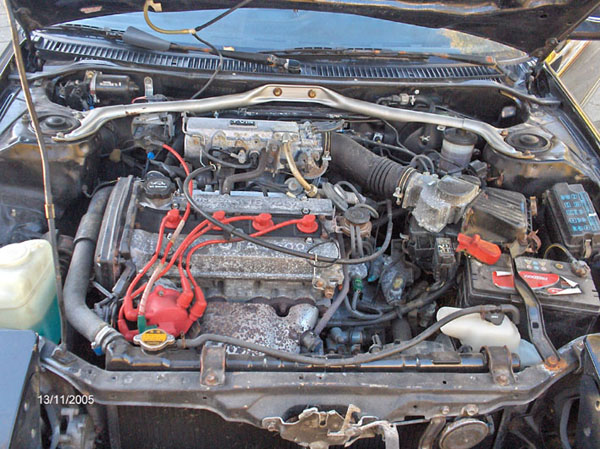
But first things first: The engine had to come out.
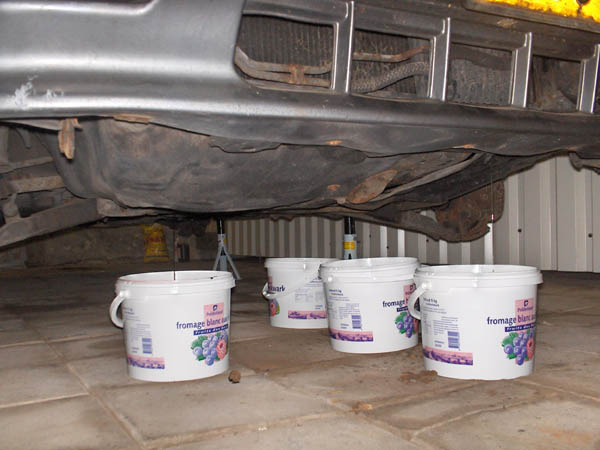
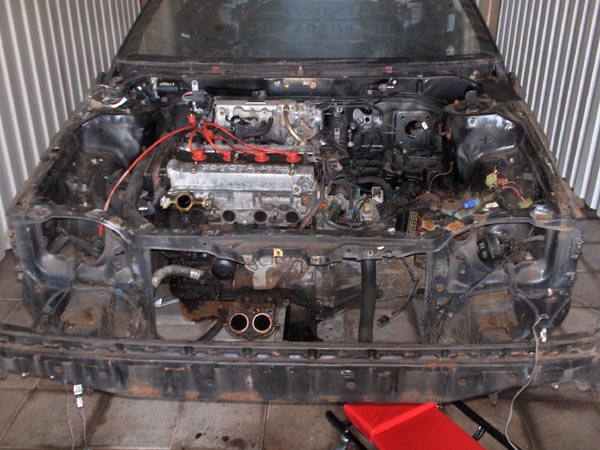
The car was already placed on axle stands and had the wheels removed. So after removing all the engine covers from the underside, I could easily drain all the fluids from the car. Engine oil, gearbox oil, coolant and such were all drained into some buckets and left to drip entirely dry.
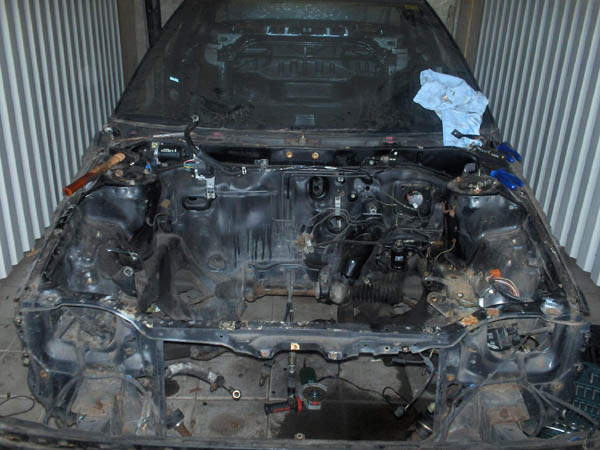
While the fluids were draining, I could carry on with stripping the front of the car to get some room up front and around the engine. So the hood, lights, front bumper and fenders were removed which freed up a lot more elbow room in and around the engine bay.
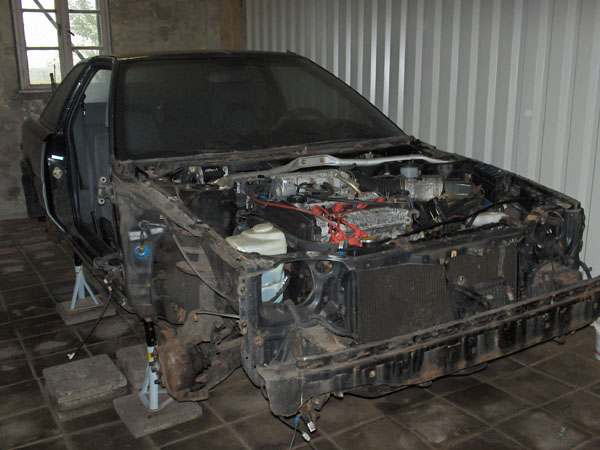
Next thing to do was remove all the peripherals around the engine. The airbox with the AFM, the radiator, the battery, exhaust and exhaust manifold, etc, etc. were all removed. When the axles were also pulled from the gearbox, everything was prepared to pull the engine from the car.
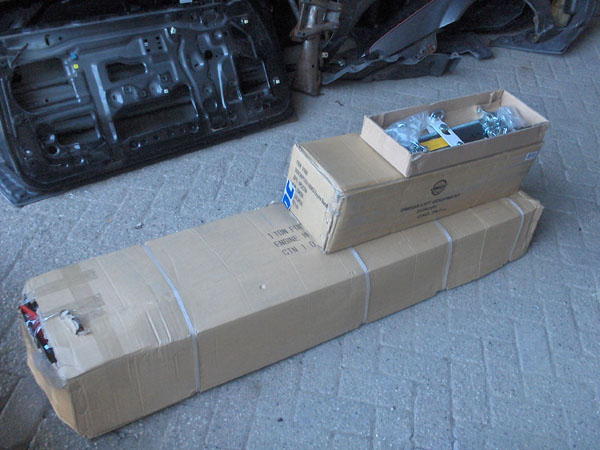
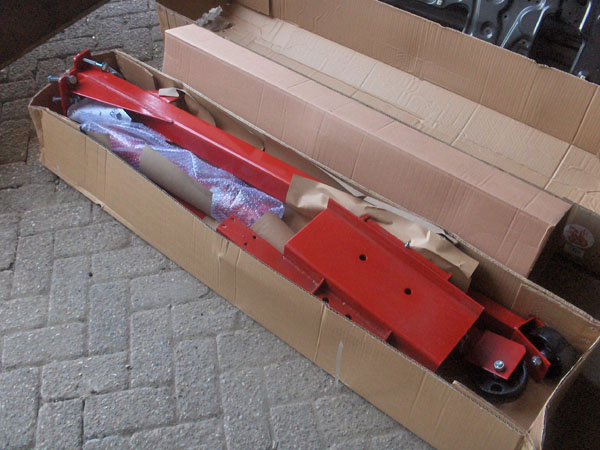
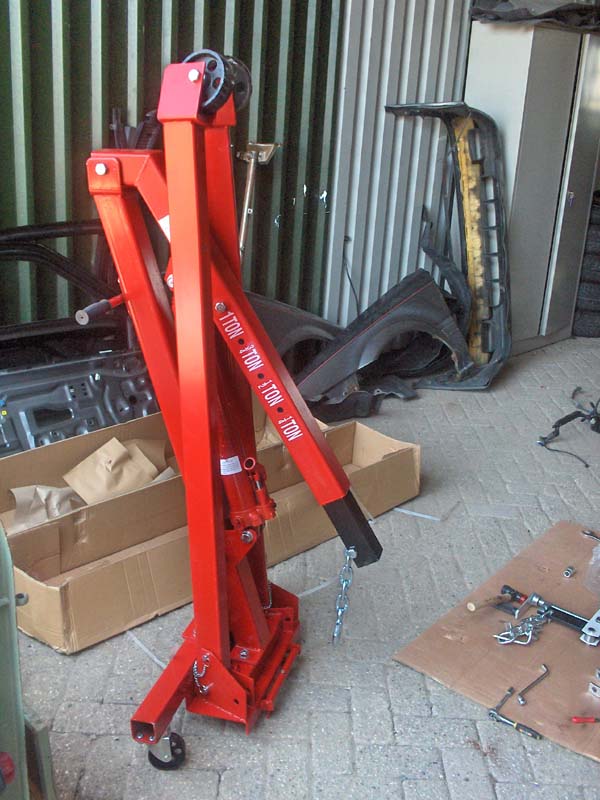
But before I could do that, I needed some more tools I didn't have at my disposal just yet. So I ordered a foldable 1-ton workshop crane with a balancing hook.
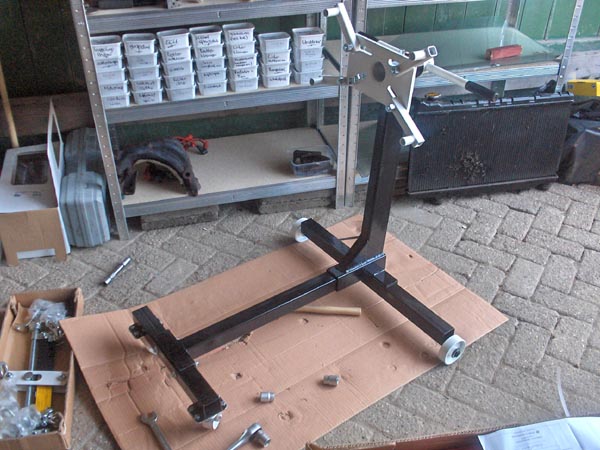
A engine stand seemed like a good idea, so I ordered one of those too, as it would make working on the engine a whole lot easier.
When they arrived, I only had to bolt them together so I could get cracking with the car again.
Now removing the engine would be a breeze!
I was still busy removing all the peripherals around the engine to get the enginebay as empty as possible. But I didn't just yank everything out and pilled them up somewhere. Before I removed anything, I made detailed pictures from several angles so that I could look up how things came apart a few months down the road.
But eventually, I got to the point I could try to hook up the engine to the new crane and see if I could hoist it out of the car. So I unbolted the subframes and after the crane took the weight off, I could remove the bolts from the enginemounts.
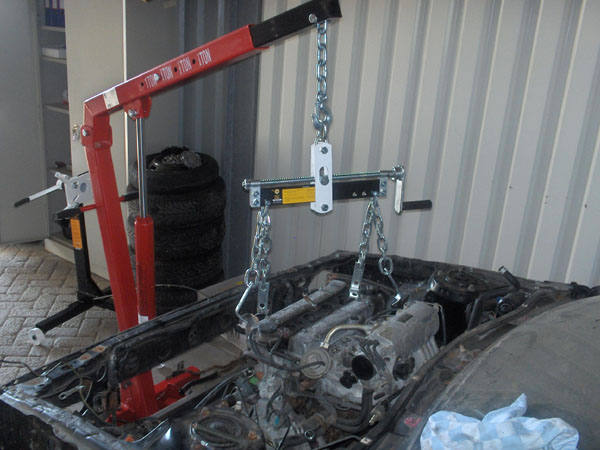
This was in fact the very first time I was going to pull an engine from a car on my own, so I had to search and fiddle a little to get it out. But the balancing hook turned out to be a real blessing and eventually, the engine came up and was pulled away from the car.
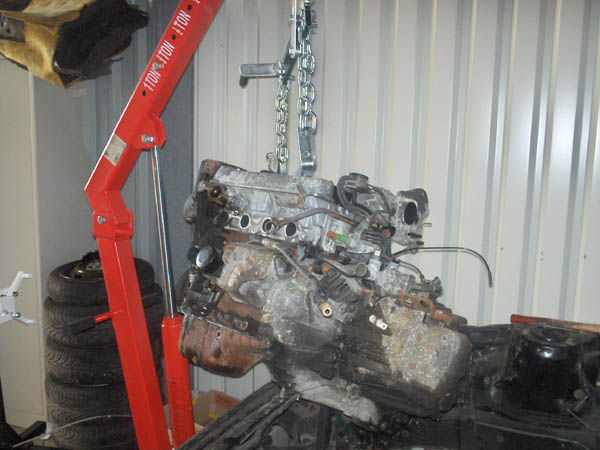
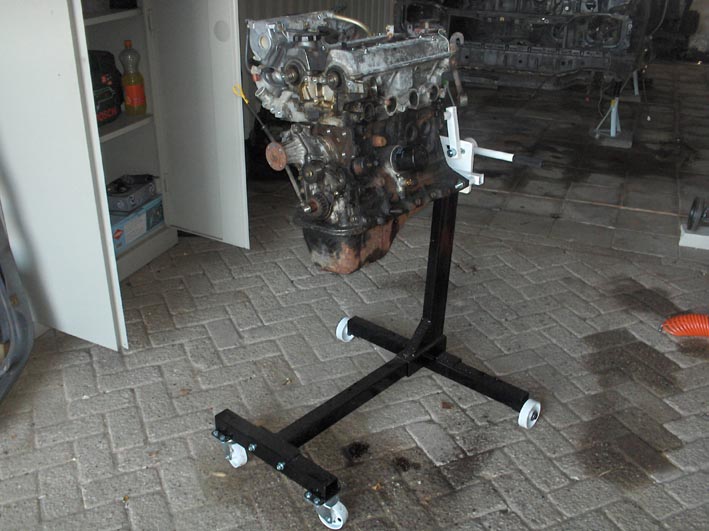
Now that I had good access to it, the gearbox had to be separated from the engine. When that was removed, I could hang the engine from the engine stand.
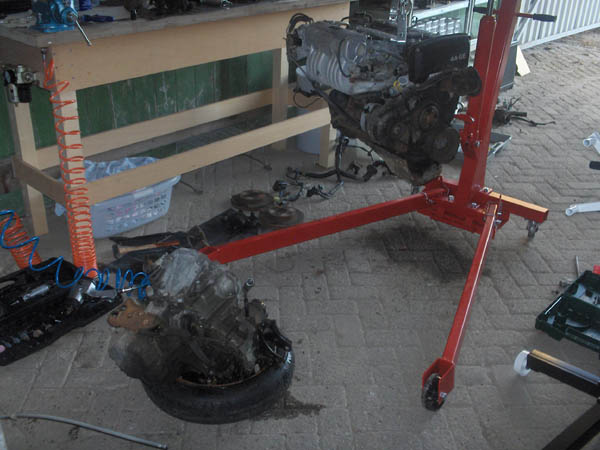
Now I could get cracking with the real interesting work: Pulling the engine itself apart.
I got kind of curious to what caused the noises from the engine and what I would encounter. And again, this would be the very first time I would dismantle a engine myself.
I roughly knew how the engine was put together, I've seen a whole lot of pictures of other peoples engines in various stages of assembly. But I've never actually seen a crankshaft or pistons or any internal engine parts.
So I knew what I had to do, but doing it for the first time on your own is still kind of exiting.
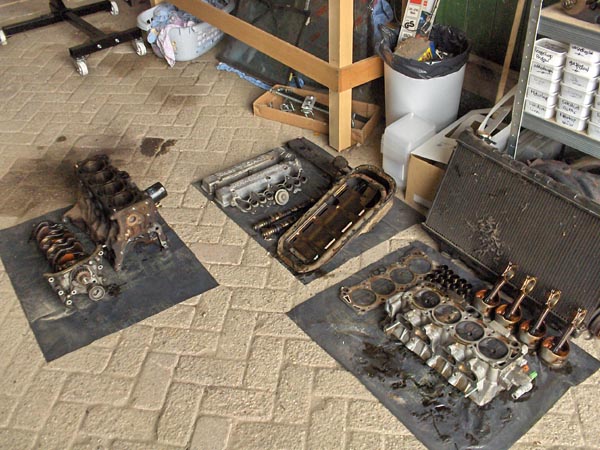
First the smaller and easy accessible parts were removed like the alternator, various pulleys, intake manifold, water pump and plumbing etc. so eventually the bare engine would remain.
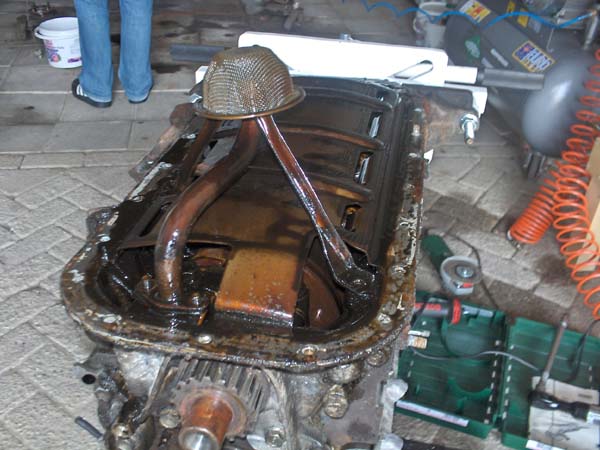
Now the engine stand showed it's worth as I could easily turn the engine over to work on the bottom end of the engine. So the oil pan was removed so I could see what laid beneath that.
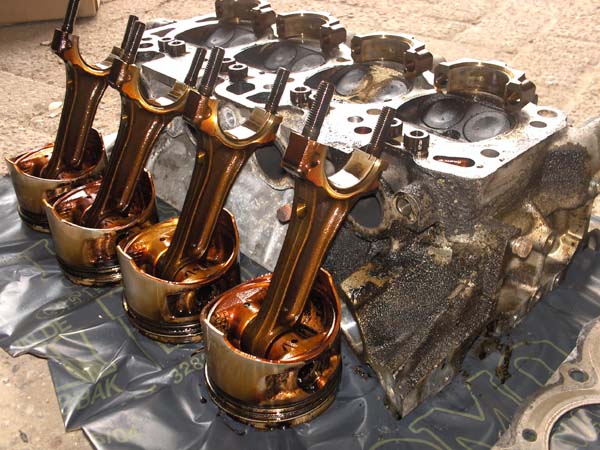
While stripping the engine, I really hadn't come across things that struck me as odd or off until now. But now that I removed the main bearing caps, even my untrained eye could see that this wasn't as it was supposed to be.
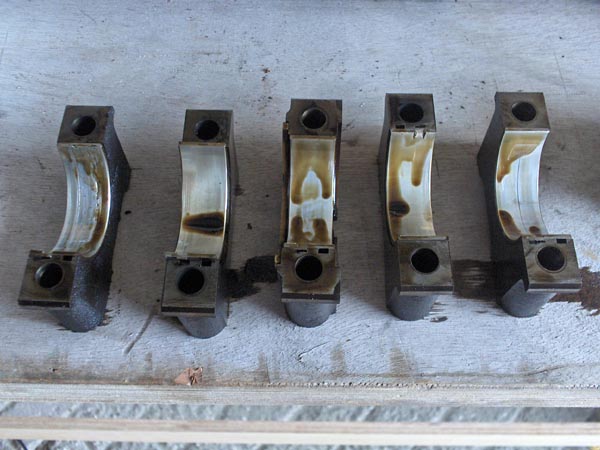
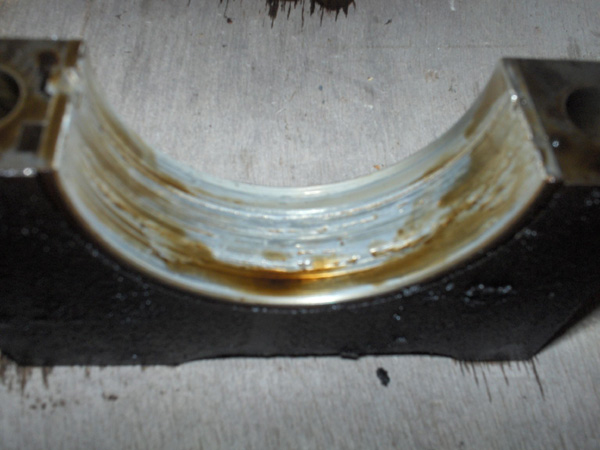
One of the crankshaft bearing was completely eaten away. The crankshaft itself luckily didn't have any signs of wear or damage nor did the bearing cap itself. And as I was already planning on replacing all the bearings in the engine, this really wasn't a biggy.
A looked around in the engine to see if I could find anything that could have caused the damage, but there were no obvious signs. Some dirt might have found it's way to the bearings or maybe the bearings have been replaced once and weren't clean when they were put back in or something like that.
Whatever the case, it didn't really matter. The bearings would be replaced and it should all be fine again.
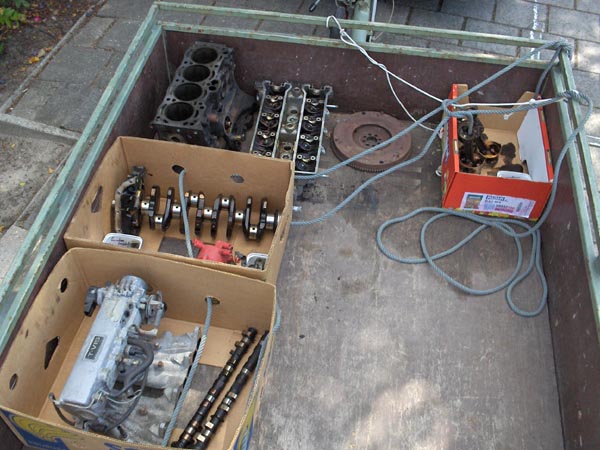
The tear down was nearly done now too. The crankshaft, connecting rods and pistons were all removed and the cylinder head was separated from the cylinder block.
I already contacted a engine refurbishing company and they were going to refurbish mine. Now that the thing was taken apart, I could drop it off there so they could start their work on it.